Log into multiple hunt groups Avaya IP Office

Logging into Multiple Hunt Groups

(This post is some info we found from Intrigant on the Tek-Tips SiteMany thanks for sharing this….)

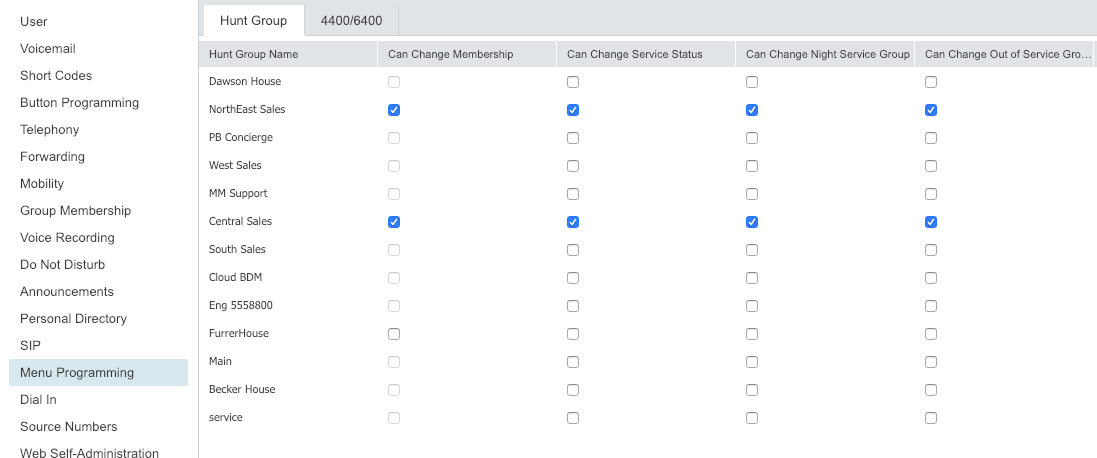
Often, we get asked how a users can be a part of numerous hunt groups, and only log into a couple of them.

Obviously a user can set up a button (“Hunt Group Enable”) and 2 things (well, really 3 now) can happen.

  1.  They leave the “Action Data” blank, which would log the users out of ALL groups that they are a member of.
  2.  They can define a group number or name in the”Action Data” field, and that button will ONLY log them in/out of that specific button.

There is now a third way, again, thanks toIntrigant” that you don’t have to use a button for each group, but can still be a part of many groups and pick and choose which you are logged into…friggin awesome.

read more

SIP Remote Worker

With SIP remote worker, there a re a few things that need to be done, prior to anything working. If using TLS, you need a certificate (Here we created a 3rd party certificate for IP Office).

Once the certificate is set, you need some settings in the IP Office.  Once those are set, your 46xxsettings.txt file should auto-generate.

Here is a video of the specific settings for IP Office:

Equinox Client Setup.  Now you can configure the equinox client.  if you need to configure Spaces, see this thread (Automate Spaces Install).

read more
Avaya IP Office Manager hard client

Log into Administration for IP Office

To log in and connect to your IP Office system follow the steps below:

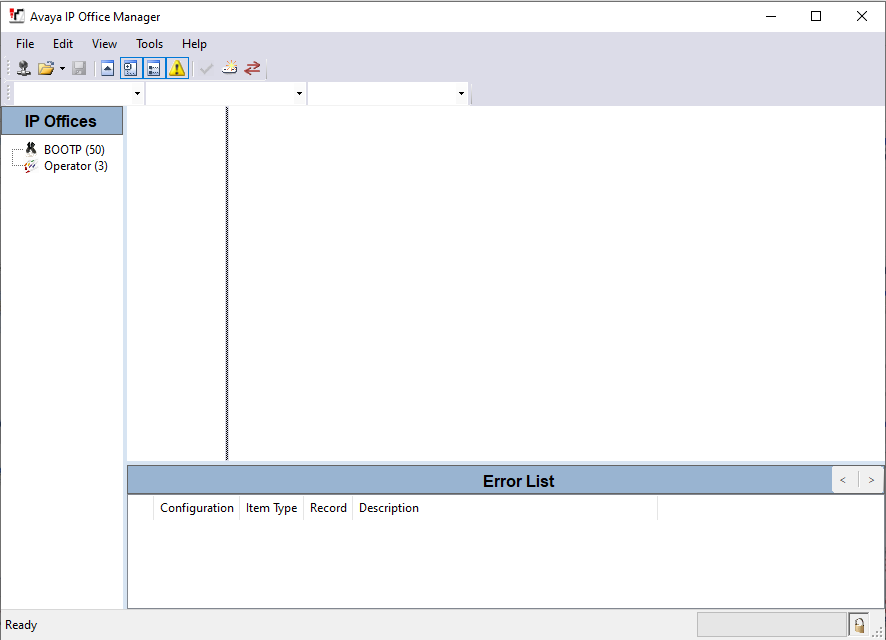
  • Double click on the IP Office Manager icon on your PC’s desktop or click on Start > All Programs > IP Office > Manager.
  • If a Windows Security Alert appears, select Unblock to allow the program to run.
  • Click on Open Configuration from the System.
  • Leave the TCP Discovery as the default IP address 255.255.255.255 and click on the Refresh button.
  • If the Manager locates an IP Office system it will show the IP Address of the IP Office system.If it doesn’t locate your IP Office system see My IP Office system is not on a network. How do I connect & log in?
  • In the top left hand corner, tick the box and press Ok. This will open the Configuration Service User Log in.
  • Enter the Administrative Server user name and password and click Ok to access the system’s configuration.

    Note
    : the default user name and password is Administrator.
  • read more

    My IP Office system is not on a network. How do I connect & log in?

    If your IP Office is not on a network and you wish to log in and connect to your IP Office system follow the steps below:

  • Connect an Ethernet cable to the LAN or the WAN(LAN2) Port, and to a stand-alone PC. The ports are located at the back of the IP Office System.
  • Ensure the PC is DHCP enabled.
  • Double click on the IP Office Manager icon on your PC’s desktop or click on Start > All Programs > IP Office > Manager.
  • When opening IP Office Manager it will check for the IP Office System. If the PC doesn’t locate the IP Office system, leave the TCP Discovery default IP address as 255.255.255.255 and click the Refresh button.
    Important note:
    The WAN (LAN2) default IP address is 192.168.43.1
    The LAN (LAN1) default IP address is 192.168.42.1
  • If a Windows Security Alert appears, select Unblock to allow the program to run.
  • If the manager locates an IP Office system, tick the box next to the default IP address and click Ok. This will open the configuration log on page.
  • Enter the Administrative Server username and password and click Ok to access the system’s configuration.
    Note: the default Username and Password is Administrator.
  • The IP Office configuration will now load and you can make any necessary changes.
  • read more

    IP office Remote Access Options

    The following are the Avaya recommended remote access options.

    • Remote Manager: Default RAS connection to the IP Office. 
    • Dameware: 3rd party application supplied with each IP Office application CD and is a free install. This software needs to be installed on any PC on which the application requiring support is running. For example, if Voicemail Pro is installed on a separate PC from that of Manager, then 
    Dameware needs to be installed on both PCs for access to both applications. 
    • PC Anywhere: Third party application that is licensed to the host and client. PC Anywhere is NOT provided by or licensed through Avaya. This software needs to be installed on any PC on which the application requiring support is running. For example, if Voicemail Pro is installed on a separate PC from that of Manager, then PC Anywhere needs to be installed on both PCs for access to both applications. Avaya Technical Support will use PC Anywhere to aid in the troubleshooting of certain issues, but the business partner must provide connectivity to the site 
    and username and password information. 
    • Webex: This third party application is a client service and requires customer interaction. This application is NOT provided by or licensed through Avaya. Avaya Technical Support can also use Webex as a remote desktop client for troubleshooting and data collection. With this application, the Avaya Tier 3 engineer assigned to the trouble ticket will provide access information to an Avaya qualified BP engineer. Internet Explorer 6.0 or newer must be available to use Webex. 

    read more

    Setting Up Hot-Desking on Avaya IP Office

    The Hot-Desking features of the Avaya IP office 500 system allow you to log on at any phone and that phone will then take on the features of your original phone including your extension number, any call forwarding options or pickup group settings. This can be especially useful if you sometimes work at a different location or in fact don’t have one fixed workspace. In order for you to be able to use this feature and log in to a phone you need to get your system administrator to assign you a login code.  The very cool thing with IP office Hot-Desking, it doe NOT matter what the origination or destination set is going to be…  Meaning, you can have an IP phone normally, but hot desk to an analog conference phone, or a 2 button digital phone.

    read more

    How do i change the name of a phone in IP Office?

  • Open Manager.(if you dont know, see Opening Manager Config)
  • Click on Users.
  • Click on the User’s name.
  • Retype the User’s new name in both Name and Full Name fields.  The name tab should be first initial and last name with no spaces.  The full name should be the first and last with a space between.
  • Under the Voicemail tab, delete all star’s in the password field (this will have no password for the new User, so simply press # when prompted for password.)
  • Click OK when changes are finished.
  • Save the configuration.(if you dont know, see Saving Config)
  • read more

    How do i open a config in IP Office?

    To do basic administration in IP Office, we would use a GUI application called Manager.  Usually it is installed on the PC running Voicemail Pro.

    The default location is “C:All Programs/Avaya/IP Office/Manager/Manager.exe”.

    Once you run that program, as it comes up, it will scan the sub-net or look for the specific IP address you entered last time it was used.  If that works, you will see a pop up of your IP Office, or all of your IP Offices.

    Select the IP office you desire to make changes to, and click OK in the bottom right corner.  At this point you will be prompted for a username and password.  While the installers might have changed this, the default is: Administrator/Administrator.

    read more

    How do I save Changes in IP Office Manager

    Click on the disk icon (3rd from left on toolbar).

    Click OK to upload the new configuration and enter username and password.

    *****Note, there will be instances where some of the changes require a reboot for the changes to take effect.  When the reboot window pops up, your choices are:

    • MERGE – Changes saved, no one knows that changes were made (No reboot)
    • IMMEDIATE – Will reboot immediately.  (Will end all calls without warning)
    • WHEN FREE – Will reboot when everyone is off the phone
    • TIMED – You can then set a specific time that the system will reboot.  NOT RECOMMENDED, as you will not know if the reboot happened or if the system comes up again.
    • read more