Diagram of Avaya IP Office SSL Certificate Settings

Create 3rd party Certificate for IP Office

First let me say that I am in no ways, a certificate or security guy.  Everything stated below is to the best of my abilities, and some info from some other very smart people.  If there is an error or wording/terminology is incorrect, please use the “Contact Us” and let us know your input.

For IP Office, with all the new applications and need for security, certificates are becoming more of a common place for IP Office programmers.  Every certificate provider will do things a bit differently, but the basics and flows are the same.

read more
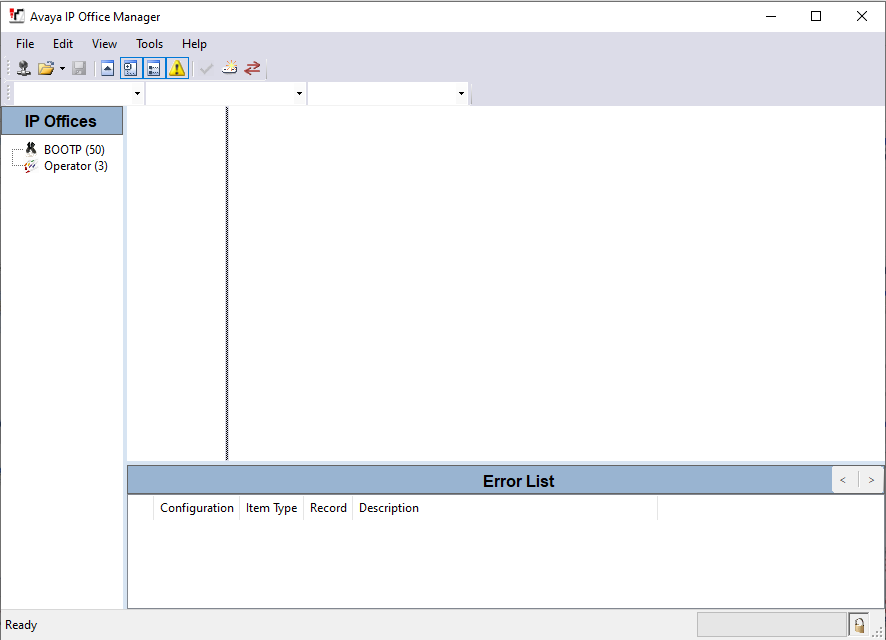
Avaya IP Office Manager hard client

Log into Administration for IP Office

To log in and connect to your IP Office system follow the steps below:

  • Double click on the IP Office Manager icon on your PC’s desktop or click on Start > All Programs > IP Office > Manager.
  • If a Windows Security Alert appears, select Unblock to allow the program to run.
  • Click on Open Configuration from the System.
  • Leave the TCP Discovery as the default IP address 255.255.255.255 and click on the Refresh button.
  • If the Manager locates an IP Office system it will show the IP Address of the IP Office system.If it doesn’t locate your IP Office system see My IP Office system is not on a network. How do I connect & log in?
  • In the top left hand corner, tick the box and press Ok. This will open the Configuration Service User Log in.
  • Enter the Administrative Server user name and password and click Ok to access the system’s configuration.

    Note
    : the default user name and password is Administrator.
  • read more

    My IP Office system is not on a network. How do I connect & log in?

    If your IP Office is not on a network and you wish to log in and connect to your IP Office system follow the steps below:

  • Connect an Ethernet cable to the LAN or the WAN(LAN2) Port, and to a stand-alone PC. The ports are located at the back of the IP Office System.
  • Ensure the PC is DHCP enabled.
  • Double click on the IP Office Manager icon on your PC’s desktop or click on Start > All Programs > IP Office > Manager.
  • When opening IP Office Manager it will check for the IP Office System. If the PC doesn’t locate the IP Office system, leave the TCP Discovery default IP address as 255.255.255.255 and click the Refresh button.
    Important note:
    The WAN (LAN2) default IP address is 192.168.43.1
    The LAN (LAN1) default IP address is 192.168.42.1
  • If a Windows Security Alert appears, select Unblock to allow the program to run.
  • If the manager locates an IP Office system, tick the box next to the default IP address and click Ok. This will open the configuration log on page.
  • Enter the Administrative Server username and password and click Ok to access the system’s configuration.
    Note: the default Username and Password is Administrator.
  • The IP Office configuration will now load and you can make any necessary changes.
  • read more

    SCN Dialing

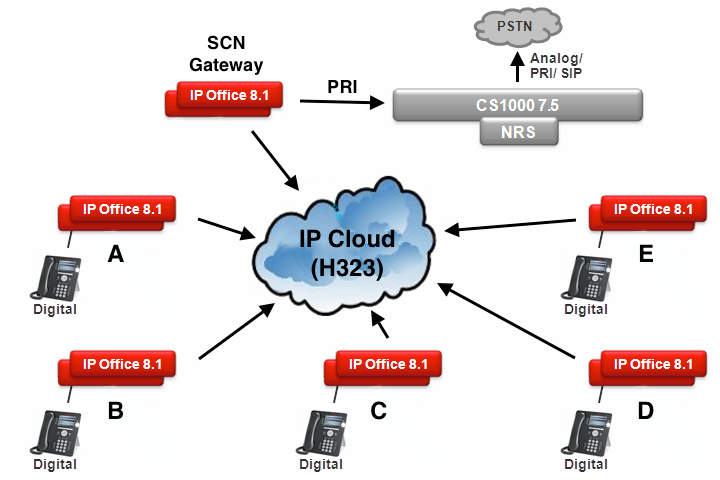
    This tutorial explains how to configure an SCN, and the ability to dial from a remote site, across an SCN network, to the main site’s trunks. The tutorial is divided into two sections, the first of which explains the configuration of Site A (the main site where the external trunks reside), and the second of which explains the configuration of site B (the remote site which needs to dial across the SCN, in order to utilize Site A’s trunks).

    Site A:

    • Address scheme:
      • IP Office LAN 1: 192.168.42.1
      • Subnet Mask: 255.255.255.0
      • Default Gateway: 192.168.42.200
      • Licenses/Hardware:
        • Confirm a valid Voice Networking license is installed.
        • Confirm a VCM or Combo card is installed.
        • Create a new H.323 Line:
          • VoIP Settings
            • Gateway IP Address: 192.168.43.1 (Site B IP Office address)
            • Supplementary Services: IP Office SCN
            Short Codes (sub-tab of H.323 line – this code is used for inbound matching – this tells the system how to handle calls when the digits 9N are matched, coming from site B)
            • Code: 9N
            • Feature: Dial
            • Telephone: N
            • LGID: 50:Main (local ARS table where external calls are routed)
            • Create a new IP Route:
              • This is a default route that will route traffic from any IP address/mask via LAN1. In cases where more granular routing is required, this route may need to be changed, but this works for most deployments:
                • IP Address: 0.0.0.0
                • Subnet Mask: 0.0.0.0
                • Gateway IP Address: 192.168.42.200 (local gateway on this network)
                • Destination: LAN1

                Site B:

                • Address scheme:
                  • IP Office LAN 1: 192.168.43.1
                  • Subnet Mask: 255.255.255.0
                  • Default Gateway: 192.168.43.200
                  • Licenses/Hardware:
                    • Confirm a valid Voice Networking license is installed.
                    • Confirm a VCM or Combo card is installed.
                    • Create a new H.323 Line:
                      • VoIP Settings
                        • Gateway IP Address: 192.168.42.1 (Site A IP Office address)
                        • Supplementary Services: IP Office SCN
                        VoIP line
                        • Outgoing Group ID: 1
                        • IP Route:
                          • IP Address: 0.0.0.0
                          • Subnet Mask: 0.0.0.0
                          • Gateway IP Address: 192.168.43.200 (local gateway on this network)
                          • ARS Table:
                            • Edit the existing ARS codes (in this example the 1N code is used, but the same must be done for all of the other ARS codes as well):
                              • Code: 1N
                              • Feature: Dial
                              • Telephone: 9N (send an extra 9 to trigger outbound dialing rules when the call is received by Site A)
                              • LGID: 1 (the LGID of the local H.323 line)
                              An ARS table with all of the codes changed is displayed below. Please note that dial emergency codes are not configured in this example, but it is always a good idea to have a local trunking solution for emergency calls.

                              Troubleshooting:

                              You should now be able to make calls from Site B, out of site A’s trunks. If you are unable to make calls, here are some troubleshooting steps:

                              read more

    Setting Up A Conference On A B149

    This How-To covers setting up a conference on an Avaya B149 Analog Conference Handset. These handsets are supported from R7.0.

    I have personally tested these steps on R9.0 and R9.1, but they should apply to any release the handsets are supported on.

    Required Configuration:
    Check there is a *47 Short Code in the IP Office configuration with the Feature set to Conference Add. If *47 is being used by something else other than Conference Add, create a new Short Code and use this new Short Code in the below steps.

    read more

    Migrate Windows Voicemail Pro to Linux

    With the UCM and the introduction of the Application Server, we no longer need to give money to Bill Gates or the Evil Empire (Microsoft).  Then, once that took off, Avaya used that as a base, for Server Edition.  

    If you are scared that you will need to learn Linux, in order to work on treh UCM/Application Server/Server Edition, then fear no more.  Think about it, we just use clients to program things….One-X Portal uses WebAdmin; IP Office uses Manager (or web manager); Voicemail Pro uses a client.  SO nothing Linux yet.

    read more

    Enable console output via telnet

    Sometimes you can’t get a serial cable connected to an IPO but you need access to the debug port, ie, no serial cable or physical access. This doesn’t help if you’re looking for startup logs but it gets you access to an IPO that’s up and running.

  • Connect via the manager
  • Expand the User section and select user NoUser.
  • Select the Source Numbers tab.
  • Use the Add button to add this magical source number:PATCHES 0x0020
  • Press OK and save the configuration to the IPO
  • Restart the IPO
  • read more

    Paging Via Voicemail Pro

    Voicemail Pro can be used to deliver pre-recorded announcements. This can be useful when the same announcement is repeated frequently. This method requires the paging port to be an analog extension.

    This method also removes the feedback loop that can occur on some sites as the page is first recorded and then played.

    Example 1

    1. In Voicemail Pro, a new Module was added and named Page. vm_module_paging_01

      1. A Post Dial action was added to the module. The properties of the Specific tab were set as shown: post_wav

      We then saved and made live the new Voicemail Pro call flow. In Manager we received the IP Office configuration and created a new short code.

      Short Code: *80

      read more
    Avaya IP Office Server Edition Backup Settings

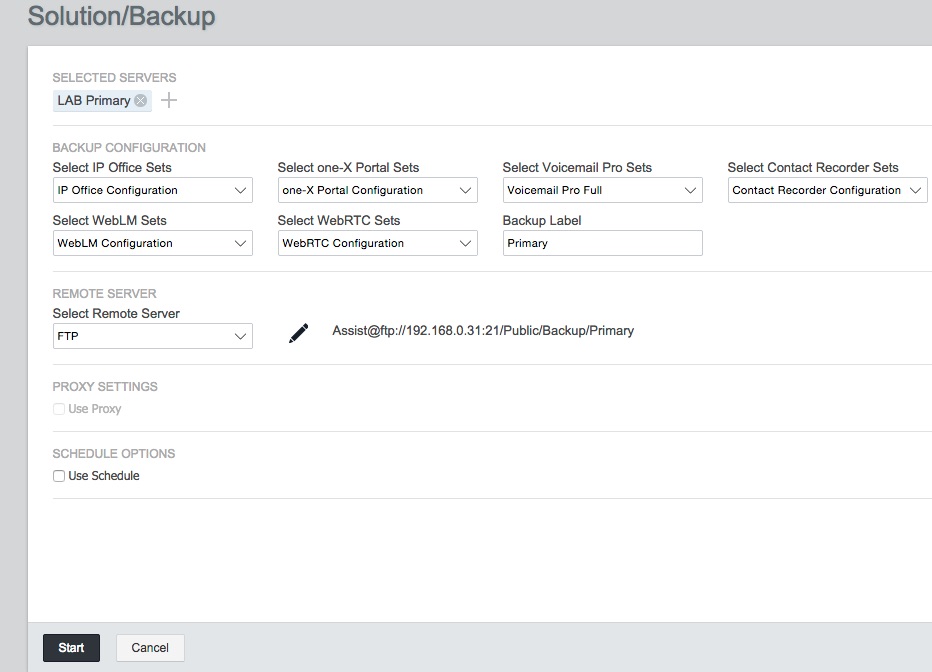
    IP Office Server Edition Backup

    Often, we get questions from customers on how to do a backup to Server Edition.  It is pretty easy, but most commonly I am finding that people are trying to save the Primary servers backup on the secondary and vice-a-verse.

    Get Fingerprint Info!

    IMPORTANT! If you might be restoring the backup to different server hardware, it is vital to get the fingerprint/UUID information with these 2 commands per Avaya’s documentation:

    ipoffice get_fingerparms 2>&1 | grep “^FP_”

    ipoffice get_fingerprint

    IP-Office_Backup_Restore_V1_englisch_230928

    read more

    FNE Codes Decrypted

    With mobility (Mobile Twinning) becoming such a common part of life for workers, IP Office can do this with ease, even on Essential Edition.

    Remembering that everyone can have Mobile Twinning for free, once the platform is licensed for Essential Edition and higher (Essential, Preferred and Server Edition).

    FNE Number Feature DID Numbers
    00 System Dial Tone 513-555-1000
    01 Steal Call 513-555-1001
    02 Auto Call Back 513-555-1002
    04 Forward All Calls 513-555-1003
    05 Forward Busy and No Answer Calls 513-555-1004
    06 Call Forward Disable 513-555-1005
    07 Park Call 513-555-1006
    08 Call UnPark 513-555-1007
    09 Pick Up Group 513-555-1008
    10 Directed Call Pick Up 513-555-1009
    12 Withheld CLI (To External Calls off IPO) 513-555-1010
    13 Enable CLI (To External Calls off IPO) 513-555-1011
    14 Conference Add 513-555-1012
    15 Drop Call 513-555-1013
    16 Private Call (cannot be intruded or recorded) 513-555-1014
    17 Held Appearance Select 513-555-1015
    18 Same as FNE 00 – Dial Tone Appearance (a=) 513-555-1016
    19 Enable Twinning 513-555-1017
    20 Disable Twinning 513-555-1018
    24 DND On 513-555-1019
    25 DND Off 513-555-1020
    26 Blind Transfer 513-555-1021
    27 Transfer to Voicemail 513-555-1022

    As you can see by the above table, we need to assign every feature we want to use, to it’s very own DID number.  Once set up, you just call that number to activate the feature.  For instance, to turn o Twinning, you would dial 513-555-1017, from the phone number that is set up for mobile twinning….soo lets look at the IP Office side of things.

    read more